- Face each side of the parts with the CNC mill
Building a box in aluminum is not that easy. It can be very challenging since a flat bar isn’t that flat! Use the CNC Mill to face each side of the 18 parts and make sure they all meet the required dimensions.
IMPORTANT: Before you start, carefully read all the instructions on how to use the CNC Mill at Wikipedia Fremont.https://dxarts.washington.edu/wiki/mach3-workflow
Also, always locate the emergency button on each machine beforehand– in case something should go wrong, you will know how to stop the machine!
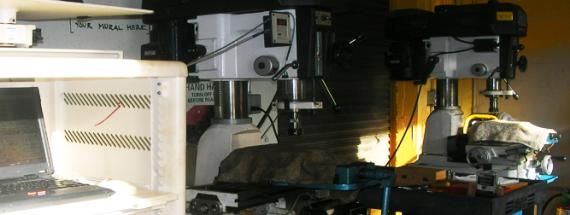
Here’s a brief description on how to use the CNC Mill. (See video below)
a) Plug in the machine, turn on the key on the Driver Rack Power Subsystem, start the March3 CNC Controller software . Using the Laser Edge Finder, verify that the vise is angled on the mill bed. Place the Laser Edge Finder in the mill collet or chuck, then make the laser dot as small as possible and follow one vertical edge along the vise jaws by moving the X-axis. If the laser dot disappears while the mill bed is moving, unscrew the vise on the mill bed slightly and with a soft hammer gently and meticulously knock the vise into position until the laser follows the edge perfectly.
- Install your stock in the mill vise properly so the mill cutter doesn't cut the vise while running your program.
- Next, with the edge-finder, set the X and Y-axis to 0 at the bottom left corner. Don’t forget to subtract half the size of the edge-finder. When the kickoff of the edge-finder begins, set the coordinates menu X-axis to –0.1 and Y-axis to -0.1.
b) Place your 3/8" end mill cutter in the chuck. Then, using the right handle, lower it until the cutter touches the top of your stock and set your Z-axis to 0 in the coordinates menu. Then click on the tab key to get the jog menu on the desktop, click on “page up” on your keyboard to move up the chuck. Then use the arrows on your keyboard to move the mill bed until the cutter is on the right side of your stock. Make sure it doesn’t touch it. (See video)
tip: When you use the arrows to jog, think about which direction you want the chuck to go.
c) Start the spindle, then find your axis of origin. Using the step jog set at 0.01" feed rate, move the bed until the cutter slightly touches the vertical edge of your stock and set the X-axis to 0 in the coordinates menu. Do the same for the Y-axis, but this time, along the horizontal edge of your stock.
d) In the INPUT command line, write down: g01 y0 x0 z–0.30 f10 and click enter.
note: g = the speed, y = vertical position, x = horizontal position, z = depth position, f = feed rate.
e) Face the side by using the INPUT command line until you obtain the required dimensions.
example: y3 x0.05, then y0 x0.07, then y3 x0.10
Occasionally add some cutting fluid and spray all the metal swarfs away. Get the cutter away from your part, stop the spindle and use a caliper to verify how much still needs to be cut. note: Don’t forget that if the limit switches are activated you will lose your xyz coordinates. Don’t move the bed too far. It is a good idea to locate the limit switches before you start. Also, as soon as you move your part in the vise, you need to establish the origin again.
f) After facing, the edges can be very sharp; you just need to sand them. tip: Don’t sand them too much because you may lose the necessary precision. Also, do it on a straight surface, such as the layout table at Fremont lab.
g) When you are done, clean the machine! All it takes are 4 easy steps.
- Remove the cutter and the collet, close the computer, turn off the key and unplug the mill
- Using the compressed air gun, blow away all the swarfs, dust, and oil on the machine, the side of the computer cabinet and the tools installed on the wall.
- Using the vacuum and the small broom, clean the entire floor around the machine.
- Place the rags back on top of the vise.