Sparkfun NS73M FM Transmitter
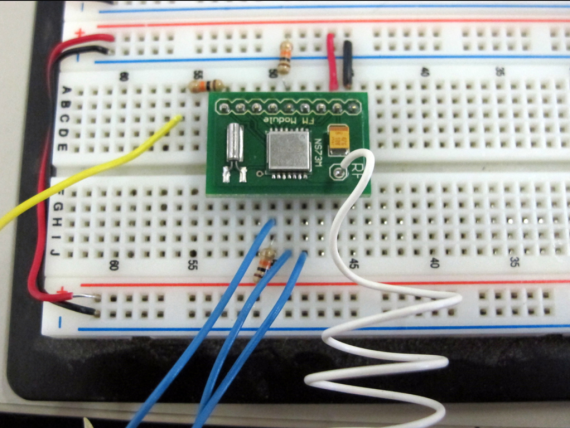
Wiring
- Connect NS73M GND (pin 0) to Arduino GND
- Connect NS73M VCC (pin 1) to Arduino +3.3V
- Connect NS73M CK (pin 4) to Arduino pin 12 through 10K resistor.
- Connect NS73M DA (pin 5) to GND through 10K Resistor. Also connect to Arduino pin 11 through IN914A diode, with cathode (black stripe) towards Arduino.
- Connect NS73M LA (pin 6) to Arduino pin 10 through 1K Resistor. Also connect to +3.3V through 10K resistor.
- Connect Arduino pin 9 to NS73M LIN (pin8) through 100 ohm Resistor. This is your audio in for FM broadcast.
Code
This code is meant to prove connectivity and transmission frequency, it generates digital tones with the arduino and broadcasts on left channel:
To transmit audio, connect an audio source to LIN, RIN, and GND. Use the code from above to set the broadcast frequency, but comment out the part that does the tone() generation in the loop() function.
Example FM stereo broadcaster: http://mikeyancey.com/FM-Stereo-Broadcaster.php